Starting photography can feel overwhelming when you first pick up a camera. Aperture, shutter speed, ISO, composition — it’s a lot of terms all at once. But here’s the truth. You do not need to know everything to create something beautiful. What you need is a basic understanding of how your camera works and how to frame a scene. This guide breaks it down in the simplest way possible so you can start shooting with confidence and creativity.
The Exposure Triangle: Your Photography Foundation
The exposure triangle is the backbone of photography. It includes three settings that work together to control the light in your image. Once you understand how aperture, shutter speed, and ISO affect a photo, you can take control of your camera in any situation.
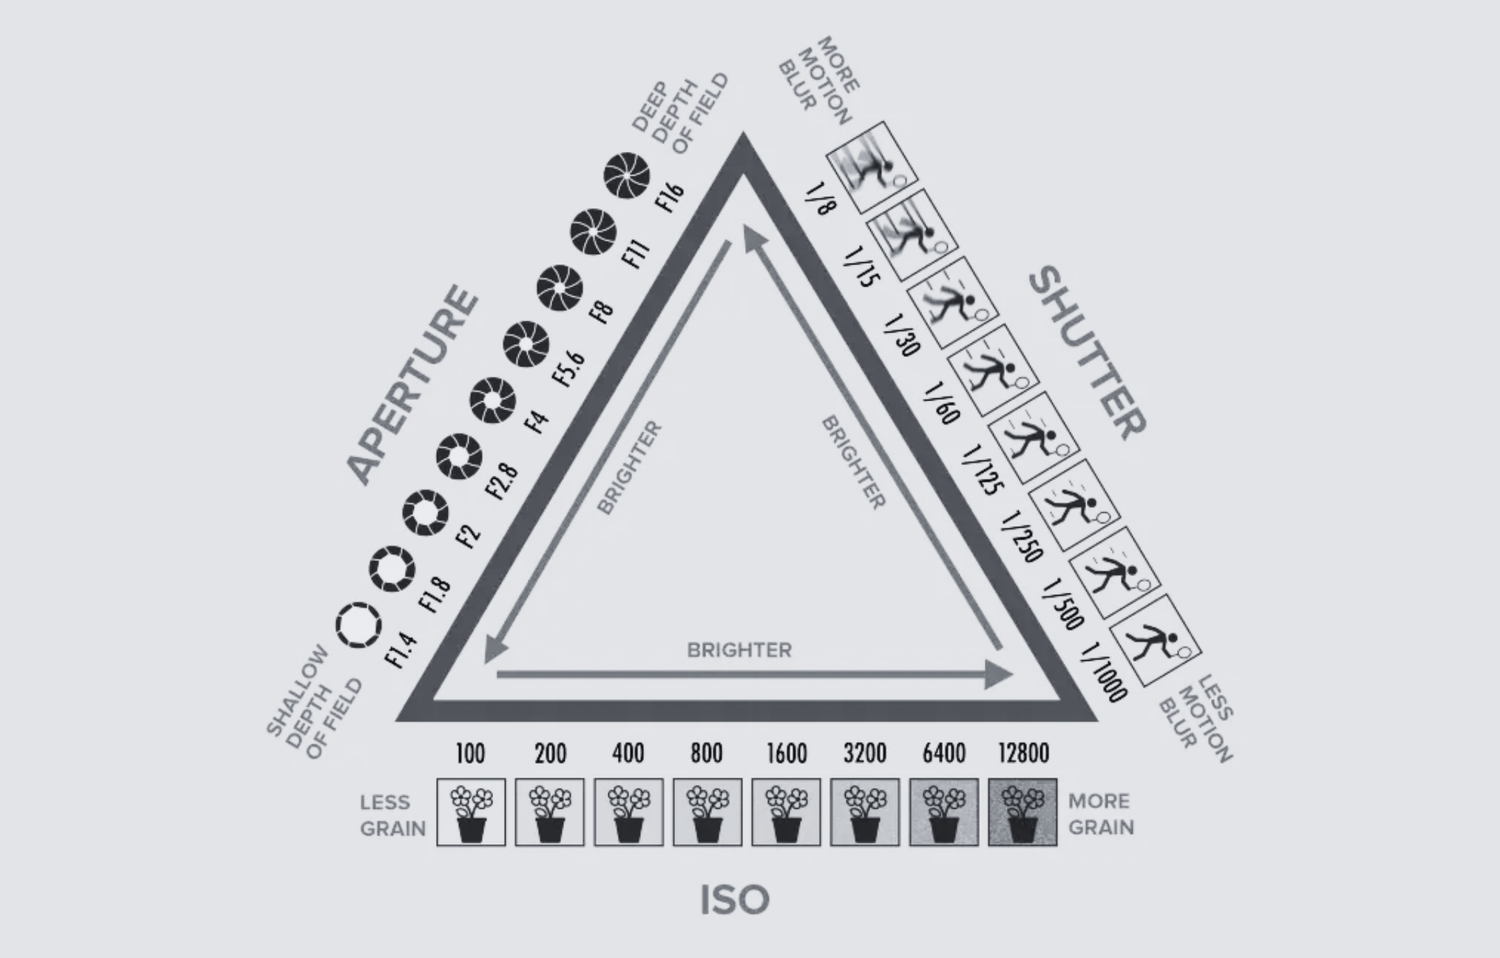
shutter speed
Shutter speed is how long your camera’s sensor is exposed to light. It affects how motion appears in your shot.
- A fast shutter speed (like 1/1000) freezes action like someone jumping or water splashing
- A slow shutter speed (like 1/10 or 1 second) adds motion blur which can be used creatively with lights or water
Use a tripod if you're going slow to avoid camera shake.

iso
ISO controls your camera's sensitivity to light.
- A low ISO (100 to 400) gives you the cleanest images with less digital noise
- A high ISO (800 and above) is useful in low light but can add grain or noise to your photos
Keep ISO low when you have enough light and increase it only when necessary.

Aperture
Aperture controls how much light enters through your lens and how much of your photo is in focus. It is measured in f-stops like f/2.8, f/4, f/11, and so on.
- A low f-number (like f/1.8 or f/2.8) creates a blurry background and is perfect for portraits
- A high f-number (like f/8 or f/11) keeps more of the scene in focus and works great for landscapes
Think of it as your focus control and light gate rolled into one.

Composition: How to Frame a Beautiful Shot
Even with perfect exposure, your photo can fall flat if the composition is off. These basic techniques will help you frame scenes in ways that feel intentional and visually pleasing.
Rule of Thirds
Imagine your image split into a grid of nine squares. Place your subject along those lines or at the intersections to create balance and tension in your composition.
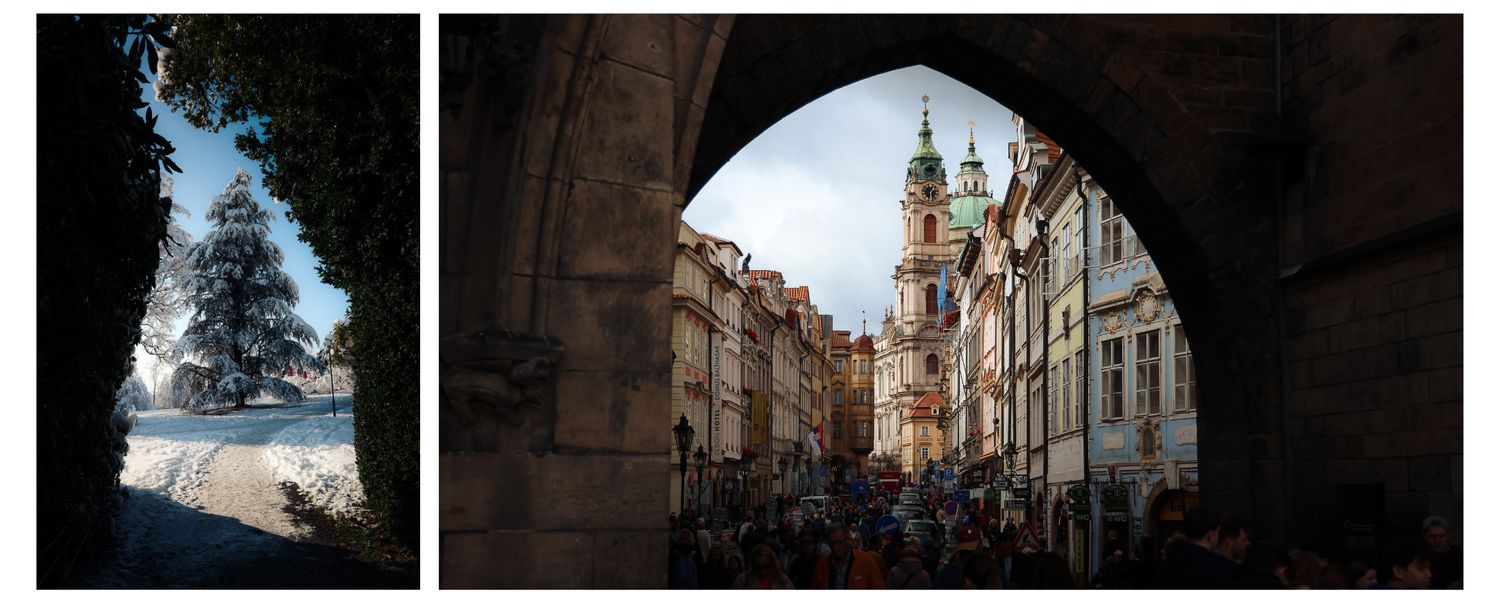
framing
Look for natural frames like windows, arches, trees, or doors to add depth and context to your shot.
leading lines
Use natural lines like roads, fences, rivers, or shadows to draw the viewer’s eye into the image and toward your subject.

Centering or Symmetry
Sometimes breaking the rule of thirds works too. Centering your subject can be interesting depending on the image. This can be especially powerful when symmetry is involved. Think reflections, architecture, or minimalistic landscapes.

using a foreground
Including something in the foreground adds depth and dimension to your image. It helps guide the viewer’s eye and creates a layered feel that makes your photos more immersive. Think leaves, rocks, windows, or even out-of-focus objects near the lens. Foreground elements can frame your subject or add texture that makes the scene feel more alive.

Negative Space
Leave room around your subject to create breathing space. This gives the eye a place to rest and can make your subject stand out more.
